-
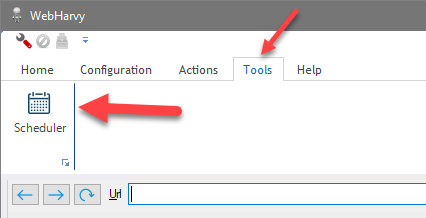
WebHarvy provides an in-built scheduler using which web scraping tasks can be scheduled to be run on a periodic basis. To open the scheduler window click the Scheduler button from Tools menu.

-
The scheduler window lists the currently scheduled tasks. To add a new task click the
 button. You may also delete
  or edit
  existing
scheduled tasks.
existing
scheduled tasks.By clicking the
 button, you can
edit tasks in
Windows Task
Scheduler interface. The Task Scheduler interface gives you finer control over how the task is
triggered and how often it should be repeated.
-
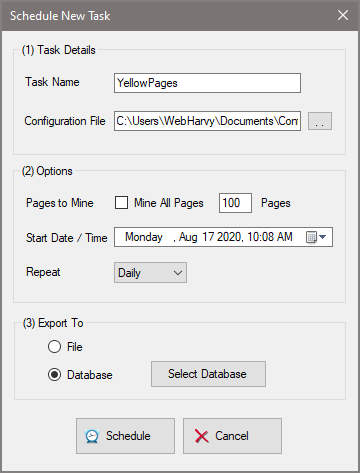
When the Add button is clicked, in the resulting 'Schedule New Task' window displayed, you may give the details of the task to be scheduled. This includes name of the task, configuration file to run, number of pages to mine, the time/frequency of mining and the file/database to export data upon completing mining. Tasks can be scheduled to be run periodically - hourly, daily, weekly or monthly. Shorter repetition intervals like 5, 10, 15 and 30 minutes are also supported. The scheduler can be set to export data to a file or database upon completing the task.
 Export to File on completion
 Export to database on completion
 -
You may also schedule mining tasks directly in Windows Task Scheduler using WebHarvy's command line options.
-
WebHarvy supports command line options, so that you can invoke the software to mine data from command prompt, external batch files, scripts or even from your own software/code.The following format should be followed while running WebHarvy from command line:
Export to File
webharvy <configuration xml file> <number of pages to mine> <export file > <optional:append|overwrite|update>
Examples:-
webharvy config.xml 10 data.csv
webharvy yp.xml -1 yp-data.xml overwrite
webharvy amazon.xml 100 amazon-data.xlsx update
If WebHarvy executable and configuration files are not present in the current path, you should provide their full path names as following :
"c:\users\tim\AppData\Roaming\SysNucleus\WebHarvy\WebHarvy.exe" "c:\myconfigs\yp-doctors.xml" -1 "c:\mydata\yp.csv"
Note:-
To mine all pages, use -1 for <number of pages to mine>.
The extension of the export file name denotes the export format (.csv, .json, .xml, .tsv).
The append/overwrite/update parameter is optional. Default action is append.
Update option is available only for excel files.
Export to Database
webharvy <configuration xml file> <number of pages to mine> db < dbserver > <type: mysql/mssql/oracle/postgresql> <db-name> <table-name> <mode:append|overwrite|update > <windows-auth:true/false> <username> <password>
Examples:-
webharvy config.xml 10 db dbserver.net mysql WebHarvyDB MyTable append false testuser mypwd
webharvy config.xml 10 db dbserver.net mssql WebHarvyDB MyTable update true
webharvy config.xml -1 db dbserver.net oracle ORCL MyTable overwrite false testuser mypwd
