- 1. Sign up for a free trial (or a paid account) of Trusted Proxies Proxy Server Cloud at the following link. https://customers.trustedproxies.com/aff.php?aff=077&goto=webharvy
- 2. Once you create a Proxy Server Cloud account you will receive your proxy IP address / port number as well as user name / password in an email from Trusted Proxies.
-
3. These details should be provided in
Webharvy > Home menu > Settings > Proxy
Settings Tab
as shown below.
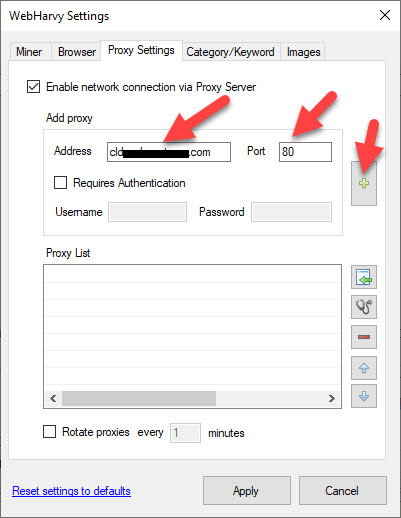 Click on the '+' button at the right after providing
these details and then click on the 'Apply' button at
the bottom.
Click on the '+' button at the right after providing
these details and then click on the 'Apply' button at
the bottom.
-
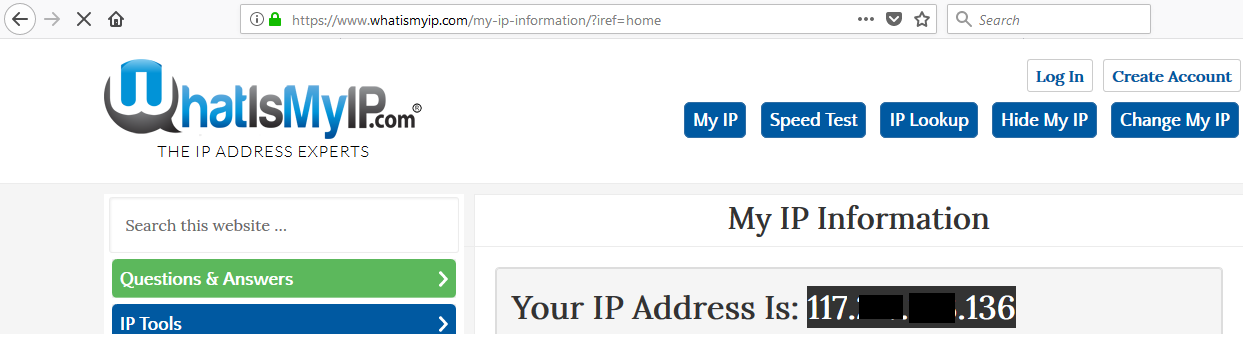
4. The next step is to find the current IP address of
your computer. Load the website
www.whatismyip.com
in any browser to find out the current IP address.
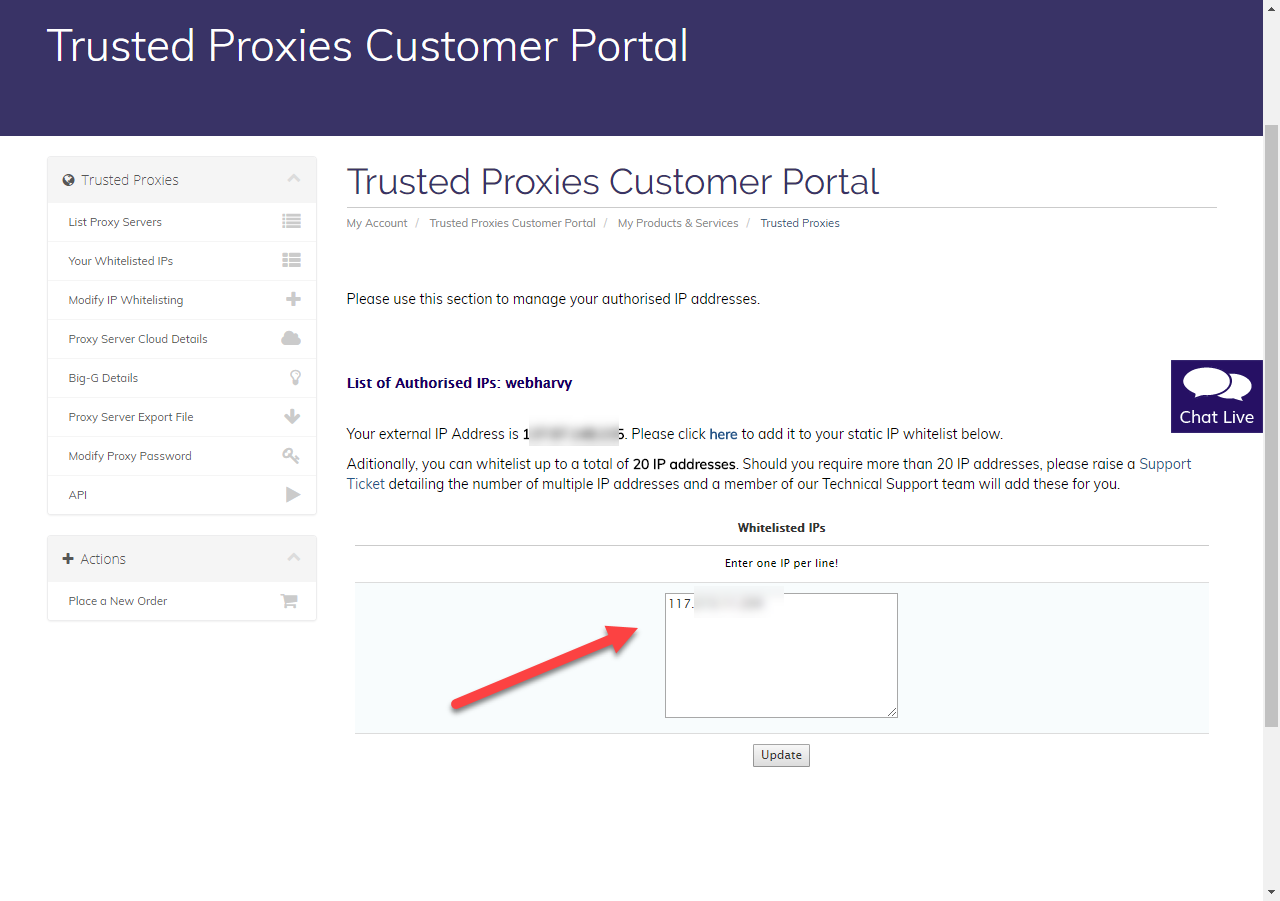
- 5. Go to Trusted Proxies Customer Portal in any browser and login with the Username and Password received in the email sent by TrustedProxies upon signing up.
-
6. In the IP Whitelist field, paste the current IP
address of your computer which you got in Step 4 and
click on the 'Update' button
 Webharvy Miner is now set to mine via Proxy Server Cloud
and authentication with Trusted Proxies is also
complete.
Webharvy Miner is now set to mine via Proxy Server Cloud
and authentication with Trusted Proxies is also
complete.
Note: To disable proxy server, you just need to uncheck Webharvy > Home Menu > Settings > Proxy Settings Tab > 'Enable Network connection via Proxy server' check box